How to Waterproof a Wooden Bathroom Vanity Effectively?

Time:2026-05-09 Author:Charlotte
0%

Waterproofing a wooden bathroom vanity is essential to ensure its longevity and maintain its aesthetic appeal. Bathrooms often experience high humidity and occasional splashes, making them challenging environments for wooden furniture. Knowing how to waterproof a wooden bathroom vanity effectively can prevent warping, cracking, and mold growth.

Many homeowners underestimate the importance of proper sealing. A common mistake is skipping preparatory steps like sanding or cleaning the surface thoroughly. This can lead to inadequate adhesion of the waterproofing agents. Choosing the right sealant is crucial. Options like varnish, polyurethane, or specialized waterproof coatings each offer different levels of protection.

Effective waterproofing not only safeguards your vanity but also enhances its beauty. A well-sealed vanity can resist moisture while showcasing the natural grain of the wood. Remember, even the best products require application techniques that vary based on conditions. Always follow the manufacturer's instructions for optimal results.

How to Waterproof a Wooden Bathroom Vanity Effectively?

Choosing the Right Materials for Waterproofing a Wooden Vanity

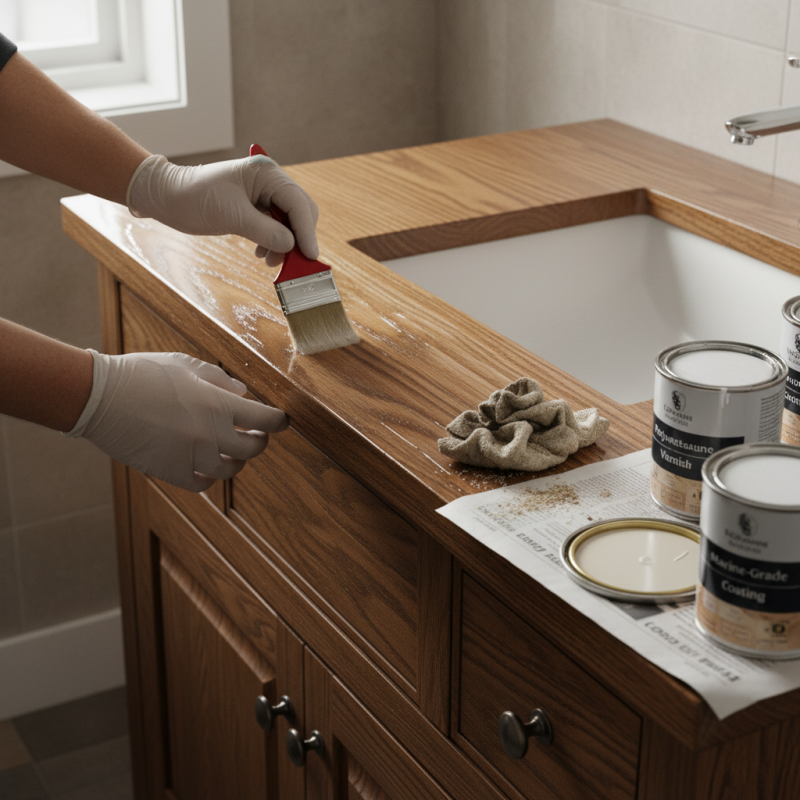
When it comes to waterproofing a wooden bathroom vanity, choosing the right materials is crucial. Wood is naturally porous, making it susceptible to moisture damage. The first step is selecting a high-quality sealant. A marine-grade polyurethane can provide excellent protection against water. It creates a tough barrier, helping to prevent leaks and spills from seeping into the wood.


Consider the type of wood used for your vanity. Hardwoods, like oak or teak, naturally resist moisture better than softwoods. However, even hardwoods require proper treatment. Using a waterproof stain can enhance the wood's natural beauty while offering a protective layer. Remember, applying these products requires careful attention. Even the best materials won't work if not applied correctly.


Another option is adding a waterproof liner inside drawers or on shelves. This can help catch any spills and protect the wood underneath. It’s not a permanent solution but an effective way to prevent accidental water damage.


Regular maintenance is also key. As time passes, the sealant may wear off, requiring reapplication. Pay attention to signs of wear. Addressing these issues promptly can extend the life of your vanity.

Preparing the Surface for Effective Waterproofing

Preparing the surface properly is crucial for effective waterproofing of a wooden bathroom vanity. Begin by removing any hardware, such as knobs and hinges. This ensures that every surface is accessible. Clean the vanity thoroughly to eliminate dust, dirt, and grease. Use a mild cleaner and a soft cloth to wipe down all areas. Pay special attention to corners and crevices where moisture might accumulate.

Next, inspect the wood for any damage. Look for scratches, dents, or existing water damage. Sand down rough areas to create a smooth surface. This helps the waterproofing agent adhere better. Use sandpaper with a grit of 120 to 220 for the best results. After sanding, wipe the vanity with a damp cloth to remove any dust created during the process. Allow it to dry completely before proceeding with waterproofing. This step is often overlooked, but it significantly impacts the effectiveness of the final waterproofing layer. Without proper preparation, you risk compromising the entire project.

How to Waterproof a Wooden Bathroom Vanity Effectively? - Preparing the Surface for Effective Waterproofing

Step Description Materials Needed Estimated Time
1 Clean the surface thoroughly to remove any dirt or grime. Mild detergent, soft cloth, water 30 minutes
2 Sand the surface lightly to promote adhesion. Sandpaper (220 grit) 20 minutes
3 Apply a wood primer to seal the wood. Wood primer, brush or roller 1 hour (including drying time)
4 Use a waterproof sealer for extra protection. Waterproof wood sealer, brush 1 hour (including drying time)
5 Let the vanity cure fully before use. N/A 24 hours

Applying Waterproof Sealants: Step-by-Step Guide

Applying a waterproof sealant to a wooden bathroom vanity is essential for durability. Start by selecting a quality sealant designed for wood surfaces. Before application, ensure the surface is clean and dry. Sand the vanity lightly to remove any imperfections. This step improves adhesion and gives you a smoother finish.

Once prepared, apply the sealant using a brush or roller. Be sure to cover all edges and corners thoroughly. Work in a well-ventilated area to avoid fumes. Allow the first coat to dry completely, following the manufacturer’s instructions. It’s often tempting to rush this process, but patience is key.

After the first coat has dried, inspect for missed spots. Apply a second coat for optimal protection. Consider a third coat if your area is particularly humid. Finally, take time to review your work. Look for any drips or uneven layers. Addressing these can prevent long-term issues. Remember, a well-sealed vanity will withstand moisture and look great for years.

Waterproof Sealants Effectiveness for Wooden Bathroom Vanities

Regular Maintenance Tips to Preserve Waterproofing

To keep your wooden bathroom vanity waterproofed, regular maintenance is key. Start by checking the surface for any scratches or dents. Even small imperfections can allow moisture to seep in. Sand these areas lightly, then apply a suitable sealant to create a barrier against water.

Clean the vanity regularly, but avoid harsh chemicals. Instead, use a damp cloth with mild soap. This prevents grime build-up and ensures the sealant remains intact. Inspect the sealant every few months. Over time, even the best products can wear down. Reapply as needed to maintain that protective layer.

Pay attention to your bathroom’s humidity. Maintaining a balanced environment helps your vanity last longer. Keep a dehumidifier nearby if it's overly damp. Allowing water to sit on the surfaces is a mistake many make. Wipe up spills promptly to prevent damage. The effort you invest in regular care pays off in the long run.

Signs Your Vanity Needs Re-Waterproofing and How to Address It

Recognizing when your wooden bathroom vanity needs re-waterproofing is crucial. Signs often include persistent water stains or peeling finishes. According to industry reports, nearly 30% of homeowners face water damage in bathrooms each year. If your vanity's surface feels a bit rough or shows discoloration, it's time to act.

Wood can be particularly vulnerable to moisture. A study revealed that untreated wood absorbs up to 40% more water than properly sealed wood. This can lead to mold growth and structural damage. Check the corners and edges of your vanity. Are they swelling? This signifies that water is penetrating the finish, indicating a need for immediate re-waterproofing.

Addressing these issues is straightforward. Sand the affected areas lightly to remove the damaged finish. Use water-resistant sealants designed for wood, ensuring every crevice is sealed. Regular inspection and maintenance can prolong the life of your vanity. However, even with care, you may find occasional water damage creeping in. Stay vigilant and don't overlook small signs; your bathroom's health relies on it.

FAQS

: What materials are best for waterproofing a wooden vanity?

: High-quality sealants, like marine-grade polyurethane, provide excellent water protection.

How does the type of wood influence waterproofing?

Hardwoods, such as oak, resist moisture better than softwoods. Proper treatment is still essential.

What additional measures can protect the vanity?

Adding a waterproof liner inside drawers can catch spills and protect wood underneath.

Why is surface preparation important for waterproofing?

Thorough cleaning and sanding create a smooth surface, helping the waterproofing agent adhere properly.

How can I tell if my vanity needs re-waterproofing?

Look for persistent water stains, peeling finishes, or rough surfaces that indicate damage.

What should I do if I find water damage?

Lightly sand the affected areas and apply a water-resistant sealant to protect your wood.

How often should I inspect my wooden vanity?

Regular inspection can help catch small signs of water damage before they worsen.

What happens if I neglect waterproofing maintenance?

Neglect can lead to mold growth and structural damage to your vanity over time.

Is reapplication of sealant necessary?

Yes, sealants wear off over time, and reapplication helps maintain protection.

Can I skip cleaning before waterproofing?

Skipping cleaning can compromise the sealant's effectiveness and lead to problems later on.

Conclusion

In the article "How to Waterproof a Wooden Bathroom Vanity Effectively," we explore essential steps to ensure your wooden vanity remains protected against moisture damage. The process begins by choosing the right materials for waterproofing, including sealants and finishes that are specifically designed for wet environments. Preparing the surface thoroughly is crucial; this involves cleaning and sanding the wood to achieve optimal adhesion of the waterproofing products.

Next, the article provides a detailed step-by-step guide on applying waterproof sealants, emphasizing the importance of even coverage and proper drying times. Regular maintenance tips are highlighted to help preserve the effectiveness of the waterproofing, while also outlining signs that indicate the need for re-waterproofing the vanity. Overall, understanding how to waterproof a wooden bathroom vanity effectively not only prolongs its lifespan but also keeps your bathroom looking pristine.

Charlotte

Charlotte

Charlotte is a seasoned marketing professional with a deep understanding of the company's portfolio and a passion for elevating its presence in the market. With a keen eye for detail and a commitment to excellence, she ensures that our professional blog is regularly updated with insightful articles......