A dark closet can turn a simple morning routine into a frustrating search through shadows. Shirts disappear between hangers, shoe pairs become unclear, and small shelves collect forgotten items. Learning How to light up the inside of a dark closet starts with visibility, not decoration. The right light should reveal fabric colors, shelf edges, and floor space without creating glare.
Lighting designer Randall Whitehead has said, “Lighting is like the jewelry of the room.” His observation also applies to closets. A carefully placed light adds function while making the space feel cleaner and more intentional. In my experience, LED strip lights, motion-sensor puck lights, and rechargeable wardrobe lamps offer practical solutions. Warm-neutral light, around 3000K to 4000K, usually shows clothing clearly without feeling harsh. Very cool light can make dark fabrics look flat and unpleasant.
Measure the closet before choosing equipment. Check the door movement, shelf depth, and nearest power source. A slim fixture under each shelf may work better than one bright lamp at the ceiling. Motion sensors are convenient, especially when both hands are full. Yet they can activate too easily. That detail is easy to overlook.
Safety still matters. Choose products designed for enclosed spaces, secure loose wires, and avoid blocking ventilation. Battery lights are simple, but batteries eventually weaken. Hardwired lighting looks neater, although installation may require professional help. There is no perfect solution. The best setup balances brightness, convenience, appearance, and maintenance. Expect to adjust it after living with the closet for a few days.
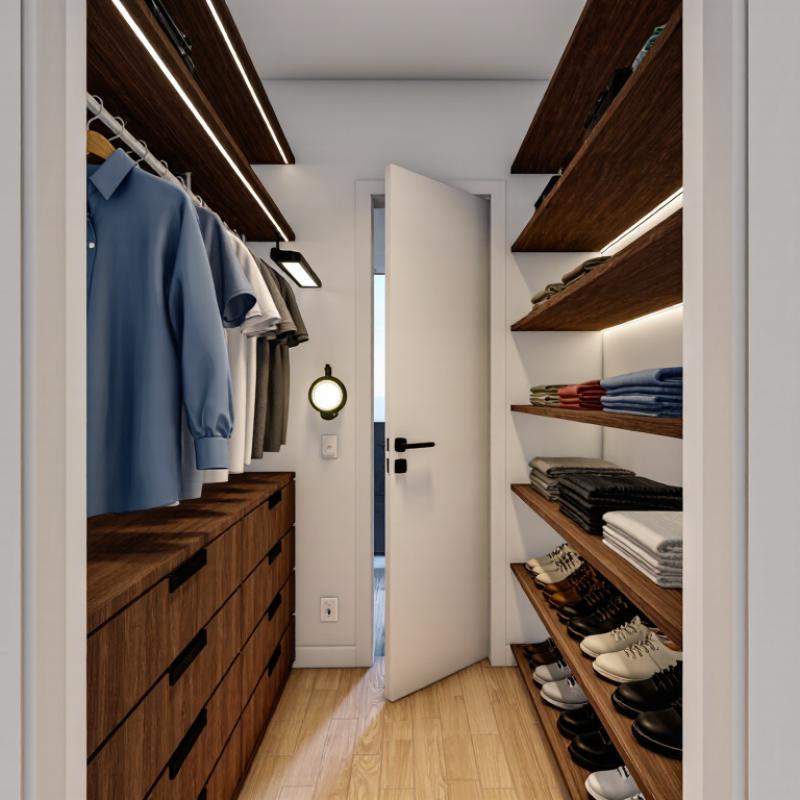
How to Light Up the Inside of a Dark Closet?
Assess the Closet’s Layout, Power Access, and Lighting Needs
Lighting a dark closet begins with its layout, not the fixture. Measure twice. Note shelves, drawers, hanging rods, and doors that may block illumination. A narrow closet often needs a slim light near the front, while a deep wardrobe benefits from lighting along both sides. Corners matter.
I once installed a single ceiling light and missed the lower shelves completely. Clothes looked visible from the doorway, yet small items stayed hidden. That mistake showed me why light placement should follow storage zones. Use brighter illumination near drawers and shelves, but avoid harsh glare at eye level. Motion activation can help when both hands are full.
Power access also shapes the safest solution. Check whether an existing electrical box, switch, or nearby outlet can support the installation. Never overload a circuit or hide loose wiring behind clothing. A qualified electrician should handle new wiring and verify local requirements. Battery-powered options may suit renters, although batteries can fail without warning. Keep it simple.
Choose the color and brightness according to the closet’s use. Neutral white light can reveal clothing colors more accurately than very warm light. A diffused cover reduces sharp shadows on dark fabrics. Test the light after closing the door, because the interior may look different from the hallway. My layout assumptions are not always right, so moving shelves before permanent installation can prevent an expensive correction.
The chart estimates the installed light output needed for three common closet layouts. The calculation uses a planning target of 200 lux and a 25% allowance for fixture, diffuser, and surface losses: required lumens = floor area × 200 lux × 1.25. Larger closets need more total light and may require multiple fixtures or separated lighting zones.
A dark closet needs more than a bright bulb. It needs light that reveals corners, clothing colors, and obstacles without creating glare. For small closets, a rechargeable LED puck light can work well. Choose one with a motion sensor and a manual switch. The sensor turns on when the door opens, while the switch provides control when needed. Soft white light around 3000K usually feels comfortable and still shows fabric colors clearly.
For larger closets, an LED strip or ceiling fixture may provide more even coverage. Select a high color-rendering rating, ideally 80 or above, so black and navy garments do not look identical. Avoid fixtures that become hot, especially near stored clothing or cardboard boxes. Keep wiring secured and away from hinges, shelves, and moving doors. A professional should handle any new fixed wiring or complicated installation.
I once installed a light near the closet entrance, assuming brightness would reach every shelf. It did not. The back corner stayed dim, and the sensor sometimes missed movement. That choice was not ideal. Test the light at night, then check the floor and highest shelf from several angles. Battery-powered lights are convenient, but batteries can weaken without warning. Mark a simple replacement date inside the closet. Moisture-resistant construction is useful near laundry areas, though it does not replace careful placement. A small night setting can also prevent harsh glare during early-morning use.
A dark closet needs more than a bright bulb. Fixture placement determines whether shelves, corners, and hanging clothes receive usable light. I usually begin with a simple plan: mark the closet’s centerline, shelf depths, and door swing. A ceiling fixture works best near the front third, not directly above the doorway. This reduces shadows from coats and upper shelves. For long closets, use two smaller fixtures instead of one powerful lamp. Place them along the walking path, with equal spacing between each light and the side walls. The goal is balanced illumination, not maximum brightness.
The Illuminating Engineering Society commonly uses about 150–300 lux for basic residential visual tasks, although closet needs vary with color, shelf depth, and user age. Treat that range as a planning reference, not a universal rule. Installable LED fixtures also support lower operating costs; the U.S. Department of Energy reports that LEDs use at least 75% less energy and can last up to 25 times longer than incandescent lamps. Choose a high color-rendering source, preferably with a CRI of 80 or higher, so navy and black clothing do not look identical. Under-shelf lights can fill dark layers, but spacing matters. Keep them slightly forward, around 10–15 centimeters from the shelf edge, to prevent the shelf above from blocking the beam. I once placed a light too far back. The floor looked bright, but folded clothes remained dim. That mistake still deserves reconsideration.
| Closet Area | Typical Dimensions | Recommended Fixture | Target Light Output | Recommended Placement | Color Temperature | Illumination Goal |
|---|---|---|---|---|---|---|
| Small reach-in closet | 0.9–1.2 m wide × 0.6 m deep | One slim ceiling-mounted LED fixture or compact surface light | 800–1,200 lumens | Center the fixture from left to right and position it slightly toward the front half of the ceiling | 3,000–3,500 K | Reduce shadows caused by the door frame and front-hanging clothing |
| Standard reach-in closet | 1.5–2.4 m wide × 0.6 m deep | One continuous linear LED fixture or two evenly spaced ceiling fixtures | 1,500–2,500 lumens | Place the light line parallel to the clothing rod; keep fixtures clear of shelf edges | 3,000–4,000 K | Provide consistent light across the full hanging section |
| Wide reach-in closet | 2.4–3.6 m wide × 0.6–0.75 m deep | Two parallel linear fixtures or a short track with adjustable LED heads | 2,500–4,000 lumens | Use one row near the front and one row near the storage side, or divide the ceiling into equal zones | 3,000–4,000 K | Limit dark areas between shelves, corners, and hanging garments |
| Walk-in closet under 3 m² | 1.5 m × 1.8 m or similar | Central LED ceiling fixture supported by vertical shelf lighting | 2,000–3,000 lumens | Center the main fixture in the walking zone; add light beneath high shelves when needed | 3,000–4,000 K | Balance general illumination with light on vertical storage surfaces |
| Medium walk-in closet | 3–6 m² | Two or more recessed or surface-mounted LED fixtures with separate switching zones | 3,000–5,000 lumens | Space fixtures evenly along the central path; aim adjustable lights toward shelves and drawers | 3,000–4,000 K | Avoid a bright center with dim perimeter storage |
| Large walk-in closet | Over 6 m² | Multiple ceiling zones plus integrated shelf or cabinet lighting | 5,000–8,000 lumens | Divide the room into 1.5–2.0 m lighting zones and place vertical lighting close to deep storage | 3,000–4,000 K | Maintain uniform coverage while allowing independent control of different sections |
| Shelves deeper than 45 cm | Storage depth over 0.45 m | Under-shelf LED strip or narrow vertical fixture with diffuser | 300–700 lumens per shelf section | Install near the front underside of each shelf to throw light toward the back | 3,000–4,000 K | Prevent the front edge of a shelf from shading folded clothing |
| Long hanging section | Rod length over 1.8 m | Continuous linear LED or two fixtures divided into equal sections | 800–1,200 lumens per 1.2 m of rod | Align the light with the rod rather than placing one fixture only at the center | 3,000–4,000 K | Reduce dark patches between garments and at the ends of the rod |
| Drawer and accessory zone | Drawers or compartments 30–60 cm deep | Low-profile interior LED light with door or motion activation | 150–400 lumens per cabinet section | Place the light near the upper front edge, shielded from direct eye level | 2,700–3,500 K | Illuminate contents without creating glare when the drawer or door opens |
How to Light Up the Inside of a Dark Closet?
Installing closet lighting correctly depends on the chosen method. For a rental, battery-powered puck lights offer a simple solution. Mount them near the front edge, not deep inside the shelf. This position reduces shadows on clothing. A motion sensor also prevents lights from staying on accidentally. The U.S. Department of Energy reports that LED lighting uses at least 75% less energy than incandescent lighting and can last up to 25 times longer. That makes LED fixtures practical for frequent closet use.
For a permanent installation, a qualified electrician should connect a low-voltage strip or ceiling fixture to the home’s wiring. Use a covered fixture, secure cable routes, and keep electrical parts away from hanging fabric. A neutral white color near 3500–4000K usually shows clothing colors clearly. Aim for roughly 100–200 lux on shelves, then check the darkest corner by eye. The Illuminating Engineering Society emphasizes that lighting quality depends on both illuminance and uniformity, not brightness alone.
I once placed a strip too far behind the door. The closet looked bright, but the doorway stayed dim. It needed repositioning. The International Energy Agency has identified lighting efficiency as an important energy-saving opportunity worldwide. Still, efficiency should not replace safe installation. Test the sensor, door clearance, shadows, and heat after installation. Small flaws become annoying quickly.
A dark closet needs more than a bright bulb. The light should reach shelves, corners, and the floor without creating harsh shadows. I usually test the position with a temporary lamp before making any permanent changes. Place it near the front, then move it toward the center and compare the visibility of dark clothing.
A motion sensor can make daily use easier, especially when both hands are full. Test its response from several distances, including the closet entrance and the back wall. A delay of one or two seconds may feel minor, but it becomes annoying during repeated use. The shutoff time also matters. Too short, and the light turns off while you are searching. Too long, and energy is wasted.
Small closets often work well with moderate brightness and neutral light around 3000–4000K. Very cool light can make colors look unpleasant.
My first setup was not perfect. The lamp illuminated the hanging clothes but left the lower shelf dim. Adding a second, lower fixture improved visibility, although it required better cable planning. Check the light with the door fully open and closed. Watch for glare on mirrors or polished surfaces.
For wired lighting, ask a qualified electrician to inspect the installation and confirm safe connections. Recheck the setup after a week. Convenience is measured during real routines, not just during installation.
Measure the closet and mark shelves, drawers, rods, doors, and corners. A narrow closet may need a slim light near the front. A deep closet may need lighting on both sides. Corners matter.
Place lights near storage zones, not only in the ceiling center. Mount puck lights near the front shelf edge. This reduces shadows on clothing. Test the position before permanent installation.
Battery-powered lights are usually practical because they avoid new wiring. Motion activation helps when your hands are full. Batteries can fail without warning. Check them regularly.
Use a covered fixture and secure every cable route. Keep electrical parts away from hanging fabric. A qualified electrician should handle new wiring and check local requirements. Do not hide loose wires.
Neutral light around 3000–4000K often shows clothing colors clearly. Shelves may need roughly 100–200 lux. Brightness alone is not enough. Even coverage matters.
Use diffused covers to soften shadows on dark fabrics. Avoid placing bright lights directly at eye level. Check reflections on mirrors and polished surfaces. Harsh glare becomes tiring quickly.
Test it from the entrance, center, and back wall. Check whether the light responds within one or two seconds. The shutoff delay should not interrupt searching. Test with the door open and closed.
A single ceiling light may illuminate hanging clothes but miss lower shelves. I made that mistake once. A second lower fixture helped, but cable planning became harder. Recheck the setup after one week.
Learning how to light up the inside of a dark closet begins with evaluating the closet’s size, layout, available power sources, and everyday lighting needs. Consider whether the space requires a gentle glow for quick access or brighter illumination for organizing clothes and stored items. Choose a suitable light type with safety and visibility in mind, favoring options that produce minimal heat and are easy to operate. Motion or door-activated lighting can also make the closet more convenient.
Next, plan the fixture placement so light reaches shelves, corners, and hanging areas without creating harsh shadows. Install the lighting according to the selected method, keeping wiring secure and maintaining clear access to stored belongings. After installation, test the brightness, activation response, and coverage. Make adjustments as needed to improve convenience, energy efficiency, and overall visibility. With thoughtful planning, How to light up the inside of a dark closet becomes a simple home improvement project that creates a brighter, safer, and more organized storage space.