How to Fix Peeling Laminate on Cabinet Doors

Time:2026-09-09 Author:Amelia
0%

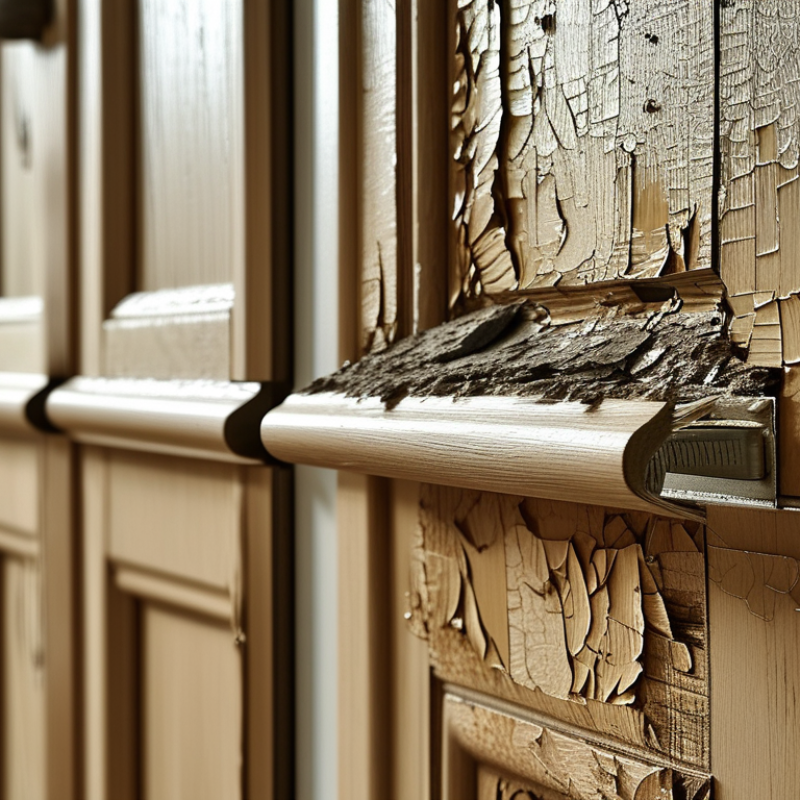
Peeling laminate can make a sound cabinet door look damaged beyond repair. Usually, the problem begins with weak adhesive, trapped moisture, heat, or a swollen substrate. A loose corner may seem minor. It can spread quickly.

Home-improvement expert Danny Lipford offers a useful principle: “Fix the cause before you fix the finish.” That advice matters here. Reattaching the laminate without checking the door may create another failure. Look behind the lifted layer. Is the wood fiber crumbly? Is the panel bowed? Does the door sit beside a steamy dishwasher? These details change the repair.

This guide explains How to fix peeling laminate on cabinet doors with practical, controlled steps. You will learn how to clean the surfaces, remove failing adhesive, apply suitable contact cement, and clamp the laminate evenly. A sharp utility knife, fine sandpaper, masking tape, and a small roller can make the work more precise. Keep the area dry and ventilated.

Not every door deserves a repair. Deep swelling, cracked laminate, or repeated lifting may justify replacement. That can feel disappointing. It is also honest. A careful repair should improve appearance and durability, not hide a continuing moisture problem. Test the adhesive on an unseen edge first. Some finishes react badly, and small mistakes become visible under bright kitchen lighting. Expect a better door, not always a factory-perfect door.
How to Fix Peeling Laminate on Cabinet Doors

Identify the Cause and Assess the Laminate Damage

Peeling laminate usually signals more than a loose corner. Moisture may have entered through an exposed edge, causing the fiberboard underneath to swell. Heat from nearby cooking equipment can also soften old adhesive. Repeated pulling, poor bonding, and household humidity are other possible causes. Skip the glue. Press the raised area gently and inspect the surrounding surface. Look for bubbles, darkened edges, powdery material, or a musty smell. A dry, firm substrate suggests limited bond failure. A swollen or crumbly substrate points to deeper damage.

In cabinet repairs, I have learned that the visible flap is not always the real problem. Once, I treated a small lifted corner, then found moisture damage beneath the hinge plate. That mistake made the repair look neat for only a few weeks. Remove the door and examine its back, edges, hinge holes, and nearby panels under bright light. Use a straightedge to check for warping. Test questionable areas with a dry fingertip, not a soaked cloth. Mark hollow-sounding or flexible sections with removable tape.

Small lifting may be repairable after the cause is controlled and the surface is cleaned. Widespread bubbles, cracked laminate, swollen edges, or loose core material usually require panel replacement. Photograph the damage before removing anything. It helps compare changes and prevents guesswork. If the cause remains active, even careful work can fail again.

How to Fix Peeling Laminate on Cabinet Doors: Identify the Cause and Assess the Laminate Damage

Use this practical 0–4 inspection scale to decide whether a peeling laminate panel is suitable for cleaning and re-bonding or needs partial replacement. Higher scores indicate more severe damage to the laminate or substrate. Check moisture exposure, heat sources, loose edges, bubbling, cracks, and exposed particleboard before repairing.

Gather the Tools and Materials for the Repair

Before repairing peeling laminate, gather every tool and material on a clean, stable surface. You will need a utility knife, a narrow scraper, 120- and 220-grit sandpaper, and a small sanding block. Keep a soft brush, lint-free cloths, mild degreaser, and warm water nearby. A laminate-safe adhesive, disposable mixing stick, small brush, and rubber roller will help spread pressure evenly. Add masking tape, a drop cloth, nitrile gloves, and eye protection.

Check the cabinet door before buying supplies. If the substrate feels swollen, soft, or crumbly, adhesive alone may not provide a lasting repair. You may need filler or a replacement panel. I once skipped this inspection, and the laminate lifted again after several weeks. That mistake was avoidable. Test the adhesive on an unseen edge, because some formulas can stain or soften the surface. Work in a well-ventilated area, and follow the adhesive’s curing instructions carefully. Keep a few clean weights or small clamps ready, but place cardboard between them and the door. This prevents pressure marks. A timer is useful, too. I often underestimate curing time. Don’t rush it. Loose laminate can hide dust, old adhesive, or moisture, so prepare for extra cleaning rather than forcing the repair forward.

Remove Loose Laminate and Prepare the Cabinet Surface

Peeling laminate usually begins at an edge, corner, or damaged seam. Start by removing the cabinet door and placing it on a padded, stable surface. Wear gloves and protect your eyes from sharp fragments. Lift only the loose laminate with a plastic scraper. Do not force sections that still bond firmly.

A hair dryer on low heat can soften stubborn adhesive. Keep it moving, and check the surface every few seconds. Excessive heat may warp the laminate or weaken the cabinet core. Remove remaining glue with a scraper and a small amount of suitable adhesive remover. Test the remover on a hidden area first. Ventilate the room well.

The surface must be clean, dry, and flat before new laminate is applied. Sand raised glue lightly with medium-grit paper, then smooth the area with finer paper. Avoid sanding through the cabinet’s protective coating. Wipe away dust with a slightly damp, lint-free cloth, and let the door dry completely. I once rushed this stage and trapped fine dust beneath the replacement sheet. The result looked acceptable at first, but the bumps became obvious in bright light. Check the edges with your fingertips. They should feel even, not sharp or brittle. Repair deep chips with a compatible filler, then sand again after it cures. Do not continue while the surface feels soft or damp.

Apply Adhesive and Secure the Laminate in Place

Peeling laminate on a cabinet door usually begins at an edge or corner. Dust, heat, and repeated moisture can weaken the original bond.

I once rushed a similar repair and pressed the laminate down too soon. It lifted again within days. Patience matters more than pressure.

Remove the door hardware and place the door flat. Carefully lift the loose laminate without bending it sharply. Scrape away brittle adhesive, then clean both surfaces with a suitable degreaser. Let them dry completely.

Lightly roughen the hidden bonding surfaces with fine-grit sandpaper. Do not sand through the decorative layer. Test the adhesive on an unseen area before applying it widely.

Use an adhesive designed for laminate and cabinet surfaces. Follow its coverage and curing instructions closely. Apply a thin, even layer to the substrate and the laminate, if required. Avoid thick puddles. They can create soft spots and visible ridges. Allow the adhesive to become tacky when the instructions call for it.

Align the laminate carefully, because repositioning may become difficult. Press from the center toward the edges with a laminate roller or a clean, flat block.

Protect the surface with wax paper, then add even weights or clamps. Use light pressure. Excessive force can crack the laminate or distort the door.

Leave it undisturbed for the full curing period.

My imperfect repair taught me to check every edge after curing, not just the center.

Trim any excess carefully, reinstall the hardware, and inspect the door after several openings.

Trim, Smooth, and Protect the Repaired Cabinet Door

Peeling laminate on a cabinet door often leaves a brittle, uneven edge. Trim the loose material with a sharp utility knife, following the door’s original line. Do not pull it away forcefully. That can tear the intact laminate and enlarge the repair. I use a straightedge for long cuts and small scissors around rounded corners. Keep the cut shallow. The substrate should remain untouched.

Smooth the exposed edge with fine-grit sandpaper, using short strokes in one direction. Remove dust with a dry, lint-free cloth. Press the remaining laminate flat with a clean roller or wrapped block. A thin layer of suitable adhesive can secure lifting edges, but excess adhesive creates ridges beneath the surface. I learned this after one repair dried with a visible bump. It looked acceptable from a distance, yet the defect showed clearly under kitchen lighting.

Protect the repaired cabinet door with a compatible sealant or edge coating. Apply several thin coats instead of one heavy layer. Allow each coat to dry fully, and lightly smooth rough fibers between coats. Keep water, steam, and abrasive cleaners away from the edge during curing. A soft cloth is safer than a rough sponge. Check the door after several days, especially near the sink. If the laminate continues lifting, the underlying board may be swollen, and trimming alone will not provide a lasting repair.

How to Fix Peeling Laminate on Cabinet Doors - Trim, Smooth, and Protect the Repaired Cabinet Door

Step Repair Task Recommended Materials Key Measurement or Setting Typical Time Completion Standard
1 Remove the cabinet door and inspect the peeling area. Screwdriver, masking tape, pencil, clean work surface Mark hinge positions and identify loose, swollen, or water-damaged substrate. 10–20 minutes The door is stable, labeled, and free from hardware that could interfere with repair.
2 Clean and dry the laminate and exposed cabinet surface. Mild detergent, clean water, lint-free cloth, isopropyl alcohol Use a lightly damp cloth; do not saturate particleboard or fiberboard edges. 15 minutes cleaning; 30–60 minutes drying The surface is free of grease, dust, soap residue, and visible moisture.
3 Trim away loose or badly damaged laminate. Sharp utility knife, metal ruler, cutting mat Cut back to firmly bonded material; keep the edge straight and avoid cutting into the substrate. 10–30 minutes No hollow, curled, cracked, or powdery laminate remains around the repair.
4 Smooth the exposed edge and remove adhesive residue. Fine-grit sandpaper, sanding block, vacuum, tack cloth Sand lightly with approximately 180–220 grit; avoid rounding adjacent laminate edges. 10–20 minutes The transition feels even to the touch and has no sharp ridges or loose fibers.
5 Apply adhesive suitable for the laminate and substrate. Compatible laminate adhesive, small spreader, disposable gloves Follow the adhesive label for coverage, open time, ventilation, and application thickness. 5–15 minutes application Adhesive covers the bonding area evenly without large lumps or gaps.
6 Press the laminate flat and hold it in position. J-roller or hand roller, wax paper, clamps, flat boards Roll from the center toward the edges; use even pressure and protect the face with wax paper. 10 minutes pressing; hold as directed The laminate sits flat with no visible bubbles, lifted corners, or adhesive squeeze-out.
7 Allow the repaired bond to cure before handling. Clean weights or clamps, level supports Keep the door flat and undisturbed; use the adhesive manufacturer’s full cure time. Usually 24–72 hours The repaired area remains firmly bonded when gently tested after curing.
8 Fill and refine any remaining seam, chip, or shallow depression. Compatible filler, putty knife, 220–320 grit sandpaper Apply thin layers rather than one thick layer; sand only after the filler has dried. 30 minutes to several hours The repaired transition is smooth, level, and ready for touch-up or edge protection.
9 Protect the repaired edge from moisture and impact. Matching touch-up coating, clear protective finish, small brush Apply thin coats only to clean, dry surfaces; maintain adequate ventilation. 1–2 hours between coats The edge is sealed, visually blended, and free of tackiness before reinstallation.
10 Reinstall and check the cabinet door. Original hinges and screws, screwdriver, level Check door alignment, clearance, and smooth operation without rubbing. 10–20 minutes The door opens and closes normally, and the repaired laminate does not lift under light handling.

Safety note: Wear eye protection and cut-resistant gloves when trimming laminate, and follow all ventilation and curing instructions printed on the adhesive or coating label.

FAQS

: What commonly causes laminate to peel?

: Moisture, heat, weak adhesive, repeated pulling, and household humidity can cause peeling. Exposed edges are especially vulnerable.

How can I check whether the damage is serious?

Look for bubbles, dark edges, powdery material, or a musty smell. A dry, firm surface suggests limited bonding failure.A flexible or swollen core signals deeper damage.

Should I glue down a lifted laminate corner immediately?

No. Identify and control the cause first. Inspect the underside, hinge holes, edges, and nearby panels before applying adhesive.

When should I replace the entire panel?

Consider replacement when bubbles spread widely, the laminate cracks, edges swell, or the core becomes loose and crumbly.Small lifting may be repairable.

How should I remove loose laminate safely?

Remove the door and place it on a padded, stable surface. Wear gloves and eye protection.Use a plastic scraper. Lift only sections that are already loose.

Can gentle heat help remove stubborn adhesive?

A hair dryer on low heat may soften old adhesive. Keep it moving and check the surface every few seconds.Too much heat can warp the laminate or weaken the core.

How do I prepare the surface before applying new laminate?

Remove glue, sand raised areas lightly, and smooth the surface with finer paper. Clean away dust with a slightly damp, lint-free cloth.Let everything dry completely.

What mistakes can make the repair fail?

Trapped dust, remaining moisture, excessive sanding, and an untreated leak can cause problems. I once rushed cleaning and created visible bumps.Bright light revealed the mistake.

Conclusion

Learning how to fix peeling laminate on cabinet doors starts with identifying why the laminate is lifting and checking how much of the surface is affected. Minor peeling can often be repaired, while extensive bubbling, moisture damage, or cracked substrate may require replacing the panel. Before beginning, gather basic supplies such as a utility knife, scraper, suitable adhesive, cleaning materials, a roller or soft cloth, clamps, and fine-grit sandpaper. Remove all loose laminate carefully, clean away dust and old adhesive, and smooth the exposed cabinet surface so the new bond will be even.

Apply a thin, consistent layer of adhesive to the prepared area, then press the laminate firmly back into position. Use a roller or cloth to push out air pockets, and hold the repair securely while the adhesive sets. Once dry, trim any overhanging edges with care and lightly smooth rough spots without damaging the laminate. Finally, wipe the door clean, inspect the edges, and protect the repaired area from excess moisture, heat, and repeated impact to help prevent future peeling.

Amelia

Amelia

Amelia is a seasoned marketing professional with a wealth of expertise in our company’s core offerings. With an unwavering passion for driving growth and innovation, she plays a pivotal role in shaping our marketing strategies and enhancing brand visibility. A key aspect of her responsibilities......